To ensure your Kales Vehicle semi-trailer operates safely, reliably, and cost-effectively, following a scientific and scheduled preventative maintenance program is non-negotiable. This comprehensive guide combines Kales Vehicle’s official OEM technical specifications with practical daily care tips, providing fleet managers and drivers with a master plan to proactively manage vehicle condition and eliminate safety risks.
⚠️ Important Safety Note: While this guide covers mechanical systems for Kales trailers, for ABS (Anti-lock Braking System) diagnostics, please refer strictly to the specialized ABS manufacturer’s manual.
🆕 CRITICAL: New Kales Trailer Break-In Protocol (First 5,000 km)
During the first month of operation, metal components will “settle” and stretch. According to Kales Vehicle engineering standards, it is mandatory to perform the following checks after the initial loaded run-in period of approximately 5,000 km or one month:
- 🔹 Axle Alignment: Re-measure and correct alignment as suspension settling can alter the wheelbase, affecting tire life.
- 🟥 Suspension U-Bolts: Retorque to 600–650 N·m. Loose U-bolts are the #1 cause of leaf spring breakage in commercial trailers.
- 🟥 Wheel Nuts: Retorque to 450–500 N·m to prevent wheel loss.
Part 1: The Master Inspection & Maintenance Schedule
Below is the complete Kales Vehicle Inspection Checklist. This schedule is strictly aligned with our factory technical manual to ensure your warranty remains valid and your trailer stays road-ready.
💡 Inspection Legend:
- Daily: Driver pre-trip check (Walk-around inspection).
- 1 / 3 / 12 Month: Professional maintenance required by certified mechanics.
- Condition: Most checks should be performed in the Towing State (connected to tractor) or Unloaded where specified.
| System | Sub-System | Check Items | Dly | 1M | 3M | 12M | Judgement Standard & Remarks |
|---|---|---|---|---|---|---|---|
| Brake Device | Pneumatic Brake | Hose & connector | ✅ | ✅ | ✅ | ✅ | Replace if cracks/damage. Note: Replace hose every 2 years; reseal connector once a year. |
| Air leakage | ✅ | ✅ | ✅ | ✅ | Leakage is not allowed (In towing state). | ||
| Brake chamber pushrod stroke | ✅ | ✅ | ✅ | Standard Type: 30–35mm (Limit: 50mm). Long Stroke Type: Refer to spec (Limit ~64mm). |
|||
| Function of emergency relay valve | ✅ | ✅ | ✅ | ✅ | In normal operation. | ||
| Function of brake chamber | ✅ | No crack, wear, damage. Replace rubber diaphragm every 2 years. | |||||
| Air pressure state | ✅ | Should be Normal (In towing state). | |||||
| Components | Exhaust sound of emergency relay valve | ✅ | Should be Normal. | ||||
| Internal state of air reservoir | ✅ | ✅ | ✅ | ✅ | No moisture (Drain water). | ||
| Double safe brake mechanism | ✅ | ✅ | ✅ | Brake voluntarily when air pressure in inflating line drops to 0.4 MPa. | |||
| Brake cam wear | ✅ | No overwear or damage. | |||||
| Clearance: Drum & friction plate | ✅ | ✅ | ✅ | Max clearance within 0.5–0.7mm. Adjust if exceeded. | |||
| Brake shoe friction plate / Drum wear | ✅ | ✅ | 1. Replace plate if rivet head lower than 1mm. 2. Drum wear: Refer to axle instruction. |
||||
| Wheel Axle | Axles | Cracks, damage and distortion | ✅ | ✅ | ✅ | No cracks, damage or too big distortion. | |
| Tire pressure | ✅ | ✅ | ✅ | Refer to tire use requirements (kPa / psi). | |||
| Wheels & Tires | Wheel cracks and damage | ✅ | ✅ | ✅ | ✅ | Replace when there is serious crack or damage. | |
| Tire depth / abnormal wear | ✅ | ✅ | ✅ | ✅ | Tire depth shall not be less than 3mm. | ||
| Metal piece/stone/foreign matters | ✅ | ✅ | ✅ | Remove completely. | |||
| Tightness of wheel bolts & nuts | ✅ | ✅ | ✅ | ✅ | Torque: 450 ~ 500 N·m | ||
| Axle bearing swing (Wheel cross shake) | ✅ | ✅ | Shall not be more than 3mm. Adjust if too large. | ||||
| Oil seal aging and damage | ✅ | Replace. | |||||
| Suspension | Leaf Spring | Deflection on Right vs Left | ✅ | Deflection difference shall not be too large. Adjust if needed. | |||
| Damage / Cracks | ✅ | ✅ | ✅ | ✅ | Replace if damage is serious or if crack exists. | ||
| Connecting Parts | U bolts & nuts | ✅ | ✅ | Torque: 600 ~ 650 N·m | |||
| Connecting rod shakes | ✅ | ✅ | Pin & bush wear: Max clearance ≤1mm. | ||||
| Balance beam shakes | ✅ | ✅ | Copper bush wear: Max clearance ≤0.5mm. | ||||
| Wearing surface of the leaf spring seat | ✅ | ✅ | No overwear. Replace if necessary. | ||||
| Leaf spring offset | ✅ | ✅ | No offset allowed. | ||||
| Legs | Landing Gear | Performance (Work function) | ✅ | ✅ | ✅ | ✅ | In normal operation. |
| Damaged inner/outer cylinders; Loose parts | ✅ | ✅ | No crack, damage, or looseness. | ||||
| Wear on rotating/sliding parts | ✅ | No serious wear. | |||||
| Electric System | Wiring | Connecting parts loose/damaged; Crossover cable damage | ✅ | No looseness or damage. | |||
| Lamp Device | Function; Grimy points or damaged | ✅ | ✅ | ✅ | ✅ | In normal work; No grimy points or damage. | |
| Other Device | General | King pin: Wear, crack or looseness | ✅ | ✅ | ✅ | ✅ | No crack or looseness. Check verticality & neck wear. 50# Limit: 48mm / 90# Limit: 86mm. |
| Twist lock: Function | ✅ | Complete and in normal work. | |||||
| Reflector & license plate | ✅ | Normal (No grimy points/damage/install state). | |||||
| Frame & body (Welding parts) | ✅ | ✅ | ✅ | No deformation or large distortion. No cracks at welding parts. | |||
| Spare wheel: Steady state | ✅ | ✅ | ✅ | ✅ | Firm fixation. | ||
| Unusual parts found in former running | ✅ | Check parts to see if there is abnormality. | |||||
| Lubricating parts: State | ✅ | ✅ | In good state. |
🔩 Kales Vehicle Official Torque Specifications Cheat Sheet
Use these Kales factory-recommended torque values to prevent mechanical failure. Save this section for quick access by your maintenance team.
| Component | Torque (N·m) | Kales Maintenance Notes |
|---|---|---|
| Wheel Nuts | 450 – 500 | Check daily during break-in |
| Suspension U-Bolts | 600 – 650 | Retorque after heavy loads |
| Kingpin Locknut | 1100 – 1300 | For new or loose pins |
| Hub Lock Nut | 400 (Initial) | ⚠️ Seating Torque ONLY! Must back off 1/8–1/6 turn. |
| Brake Chamber Clamp | 30 | If leakage occurs |
Note: These specifications are proprietary to Kales Vehicle Co., Ltd. and ensure the optimal performance of Kales-manufactured trailers.
Part 2: Comprehensive Kales Semi-Trailer Maintenance Steps
Step 1. Brake System Maintenance: The Core of Safety
Proper air brake maintenance is critical for heavy-duty trailer safety. Follow these Kales Vehicle diagnostic steps:
- ✅ Connect the trailer’s air brake system to the tractor’s system.
- ✅ Check all hoses and connectors for cracks, abrasions, or leaks. Replace immediately if damaged.
- 📅 Maintenance Schedule: Replace all rubber air hoses every 2 years as per Kales safety recommendations.
- ✅ Pressurize to operating level and verify pressure via tractor gauge or emergency system gauge (Normal: 0.7~0.8 MPa).
- ✅ With engine idling, fully depress the brake pedal and hold. Pressure drop must not exceed 30 kPa per min.
- 🧼 Leak Detection: If leakage is suspected, apply soapy water to fittings—bubbles >25 mm in 3 seconds indicate a leak. Tighten or replace as needed.
- ⚙️ Check the emergency relay valve:
a) Close the semi-trailer air supply line shut-off valve on the tractor, then disconnect the air coupling and check whether the brakes automatically apply. If they do not apply automatically, the emergency relay valve is faulty.
b) Reconnect the air coupling between the tractor and the semi-trailer’s air supply line, then open the shut-off valve and check whether the brakes automatically release.
c) Check all parts of the emergency relay valve for air leaks. If soap bubbles formed at any connection do not exceed 7 mm in diameter within 3 seconds, the valve is considered leak-free and functioning normally.
d) When the brakes are released, verify that exhaust air is discharged from the exhaust port. If so, this indicates normal operation.e) If the valve operates sluggishly or fails to function properly, replace the entire emergency relay valve.
⚠️ WARNING: Critical Safety Notices
Do Not Modify: Never modify the Kales brake air system, including adding water-spray brake cooling or tapping air from trailer tanks. This compromises braking performance and may cause catastrophic failure.
❄️ Winter Care: In cold weather, moisture in the brake system can freeze inside valves (relay/ABS), causing brake drag, delayed release, or total lock-up.
- Mandatory: Drain water from all semi-trailer air tanks DAILY.
- Check the Air Dryer desiccant cartridge efficiency and replace if saturated.
- Always drain air tanks after driving. If excessive air loss affects brake function, re-pressurize.
🔧 Brake Chamber Checks:a) While operating the brakes, check whether the pushrod of the brake chamber moves freely and whether its stroke is within the specified range (standard working stroke: 30–35 mm). If the stroke exceeds 50 mm, an adjustment is required. *Note: For Long Stroke (LS) chambers, the limit may be higher (~64mm). Verify the chamber type tag before adjusting.
b) With the brakes applied, check the brake chamber for air leaks:
- Apply soapy water to the clamp area and inspect for leaks. If leakage is detected, tighten the clamp retaining nut to a torque of 30 N·m.
- Check the front vent hole for air leakage. If leaking, replace the rubber diaphragm.
- Inspect the exterior of the brake chamber for cracks or damage. If any are found, replace the entire brake chamber as necessary using Kales genuine parts.
🔧 Adjustment & Reservoir:Reservoir: Open drain valve daily to discharge condensate. Re-pressurize if emergency valve activates.
Manual Adjustment:
a) If stroke > 50mm, tighten worm shaft clockwise until seated.
b) Back off 90-180 degrees.
c) Depress pedal ~10 times to auto-adjust.
d) Road Test: Ensure vehicle does not pull to one side.
For detailed adjustment, refer to the axle manufacturer’s operating manual provided with your Kales trailer.
Step 2. Axle & Hub Maintenance
Ensuring your trailer axles are in top condition is key to longevity. Follow this hub bearing adjustment procedure carefully:
- Inspect axles and tires for bends, cracks, or damage. Use a jack with support blocks when lifting.
🔧 Hub Bearing Adjustment Protocol:
- Tighten inner hub nut to 400 N·m (to seat the bearing).
- Back off (loosen) 1/8 to 1/6 turn (ensure wheel rotates freely).
- Rotate hub—Rotate the hub and gently tap it with a hand hammer (at the hub bearing area) to check whether it turns freely. If the resistance is excessive, slightly loosen the locking nut until the hub can rotate freely on its own without noticeable wobble. Then install a cotter pin to secure the locking nut in place.
- Apply sealant to hub cap before installation.
- Daily: Check wheel nut tightness. If loose, retorque to 450–500 N·m.
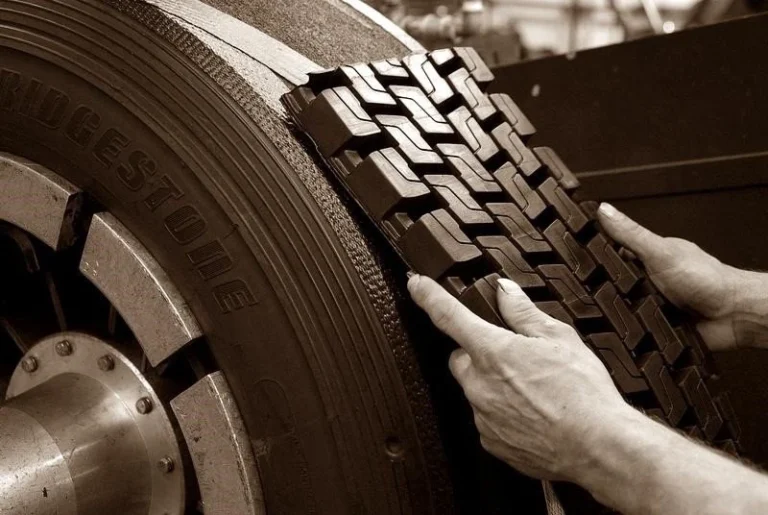
Step 3. Tire Care: Maximize Life & Safety

- 📉 Under-inflation: Causes shoulder wear, ply separation, blowouts, and higher fuel consumption.
- 📈 Over-inflation: Accelerates center tread wear and increases risk of impact damage.
- ✅ Maintenance: Maintain correct pressure (±20 kPa / ±3 psi) for all tires, including spares.
- 🔄 Rotation: Tire wear varies depending on load, road conditions, and braking behavior. To promote even tire wear, tires should be rotated regularly—every 5,000 kilometers—following the sequence shown in the Kales tire rotation diagram above.
- 🔧 Daily: The tightness of wheel nuts should be checked daily. If any looseness is found, the nuts must be retightened to a torque of 450–500 N·m.
Step 4. Suspension System Maintenance
A. Mechanical Suspension (Leaf Spring)
- Daily: Check springs for breaks. If one side is damaged, replace both sides to maintain balance.
- U-Bolts (Crucial):
- Retorque to 600–650 N·m after heavy loads.
- After replacing springs or every 5,000 km, inspect and retighten.
- Bushings: Check connecting rod bushings—replace if cracked or worn (Limit: 1mm).
B. Air Suspension
- General Care: Avoid long-term parking. Drive a few km periodically to cycle air springs.
- Cleaning: After muddy or asphalt roads, clean air springs and pistons. Replace if cracked, wrinkled, or abraded.
- Every 6 months:
- Inspect air dryer/filter—replace if clogged.
- Check air line seals and valve tightness.
- Verify U-bolt and air spring mounting bolt torque.
- Drain air tanks (increase to every 2 weeks in freezing weather).
- Verify ride height (H-value): Must match factory specification to ensure proper coupling and stability.
- Every 3 months: Inspect shock absorbers for leaks or loose mounts.
- Monthly: Check main beam bushings—no play should exist when rocking the trailer.
Step 5. Landing Gear Maintenance
- ✅ Check inner/outer tubes for smooth operation, deformation, or damage. Repair or replace as needed.
- 🛢️ Lubrication: Inject grease into the gearbox and screw mechanism. Test high/low gears under no-load conditions to ensure smooth shifting. Use Kales-approved grease for optimal performance.
Step 6. Kingpin & Fifth Wheel Maintenance
The connection point between your tractor and Kales trailer requires diligent inspection:
- ✅ Daily: Inspect kingpin for cracks, wear, or scoring.
- 📏 Wear Limits: Replace if diameter < 48.0 mm (50#) or < 86.8 mm (90#).
- 📐 Check Verticality: Replace if kingpin is bent, deformed, or shows uneven “neck” wear.
- ✅ Clean and inspect fifth wheel plate—remove debris, check for warping.
- ✅ Check the bolts of supporting seat and connection plate to see if they become loose, and if the supporting seat is damaged.
- 🛢️ Lubrication: Lubricate kingpin and fifth wheel daily with high-quality grease (e.g., calcium-based ZG-4).
🔎 Expert Checks:
- For newly changed king pin or when the king pin becomes loose, tighten up the locknut of the king pin with tightening torque of 1100~1300 N·m.
- Check the fifth wheel board to see if there is weld crack and if the wear plate is severely worn.
- Check the lock hook, wearing ring and cross bolt to see if they are heavily damaged, deformed or become loose.
- Check if the safety lock is in normal work, and whether the lever linkage is flexible or out of nimbleness.
Step 7. Chassis Frame Inspection
- Periodically inspect frame welds and main beams for cracks or distortion. Repair immediately if found. Kales Vehicle frames are built for durability, but regular checks ensure safety under heavy loads.
Step 8. Axle Alignment & Wheelbase Adjustment
Misalignment causes uneven tire wear and pulling. Check if U-bolts loosen or bushings wear.

🔧 Adjustment Procedure:
- Park on level ground, uncouple tractor, release brakes. Adjust landing gear so front/rear frame heights match (±2 mm).
- Remove outer tires and dust caps. Drop plumb lines from hub centers to ground.
- Adjust the middle axle first: Adjust the movable tie rod so that the perpendicularity of the middle axle centerline to the longitudinal center plane of the chassis in the horizontal direction is ≤6 mm—i.e., L₁ = L₂ (measured as the distance from the kingpin center to the center holes of the hub caps (axle end covers) on both sides of the middle axle). After adjustment, tighten the set screws on the rod ends.
- Adjust the front axle: Adjust movable tie rod 1 to ensure the horizontal distance between the front and middle axles meets a tolerance of ≤5 mm—i.e., B₁ = B₂ (measured as the distance between the center holes of the hub caps (axle end covers) on both sides of the front and middle axles).
- Adjust the rear axle: Adjust the movable tie rod to ensure the horizontal distance between the rear and middle axles meets a tolerance of ≤5 mm (measured as the distance between the center holes of the hub caps (axle end covers) on both sides of the middle and rear axles).
- Tighten all bolts and nuts: Use box wrenches or socket wrenches to symmetrically tighten all fasteners to the specified torque values according to their specifications.
Part 3: Kales Technical Resources & Troubleshooting
For detailed lubrication charts (grease types, specific points) and comprehensive troubleshooting guides (symptoms, causes, and solutions), please refer to our dedicated technical support pages:
- 🛢️
Lubrication Guide:
Click to View Full Lubrication Guide - 🔧
Common Faults & Solutions:
Click to View Troubleshooting Guide
Conclusion
By following this Kales semi-trailer maintenance manual, you protect your investment and ensure road safety. Regular maintenance according to these OEM standards is the best way to maximize the lifespan of your heavy-duty trailer.
Ensure your vehicle stays within warranty by using certified components.Contact Kales Service Team